Feedback
Wait a moment
Oops! Something went wrong!
Introduction
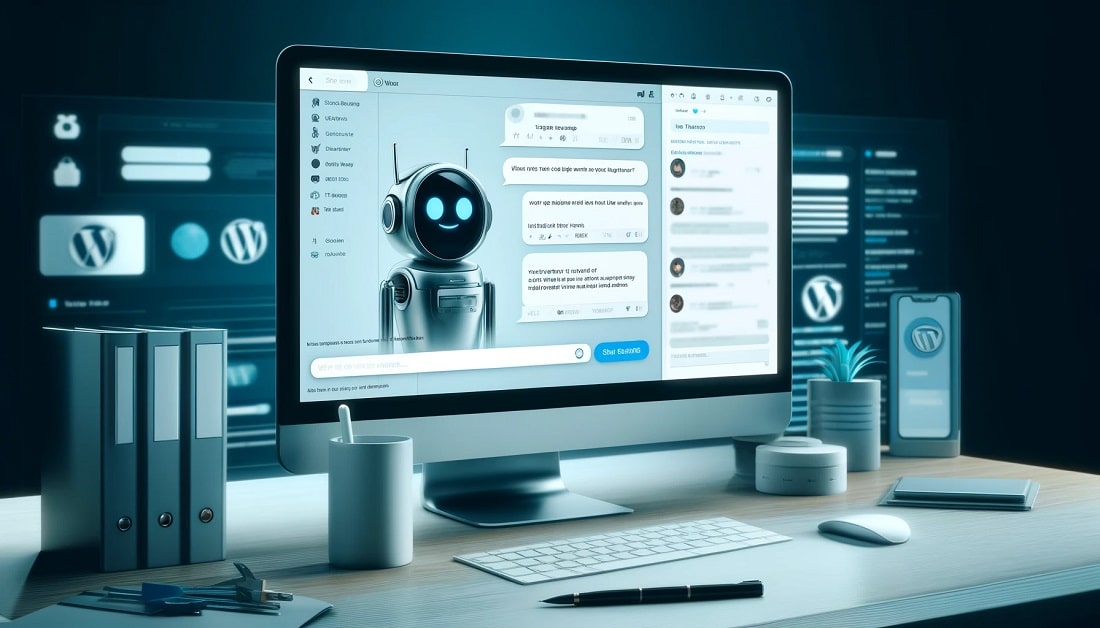
I found a great resource on how to create a custom and free AI-powered chatbot to a WordPress website. I’ve implemented it to this page so you can see it in action.
If you want to try it yourself follow this video guide:
Complete open-source code can be found on github:
https://github.com/hassancs91/AI-CHATBOT-Wordpress
Below is a quick overview about how the chatbot works and how it’s implemented.
1. Introduction
Overview:
Lets see how you can integrate a GPT-based chatbot into your WordPress website using the WP Code plugin. The chatbot is designed to assist visitors and provides a dynamic, interactive experience.
Prerequisites:
- A WordPress website
- WP Code plugin installed and activated
- OpenAI API key
2. Setting Up WordPress Environment
Installing and Activating the WP Code Plugin:
- Go to your WordPress dashboard.
- Navigate to
Plugins > Add New. - Search for
WP Code. - Install and activate the WP Code plugin.
3. Adding the PHP Code
Creating a New PHP Snippet in WP Code:
- In your WordPress dashboard, go to
WP Code > + Add Snippet. - Select
PHP Snippet. - Name your snippet (e.g., “Chatbot API Interaction”).
- Paste the provided PHP code into the code editor.
- Save and activate the snippet.
PHP Code Explanation:
- The PHP code handles the server-side logic, including making API requests to OpenAI and processing responses.
- The
generate_chat_responsefunction sends a prompt to OpenAI’s API and retrieves the response. - The
handle_chat_bot_requestfunction processes incoming chatbot requests. - REST API routes are registered to handle chat requests and load configuration data.
PHP Code Adjustments
- API Key Configuration: Make sure you define the OpenAI API key in your
wp-config.phpfile or replaceOPENAI_API_KEYwith your actual API key.php// Define the OpenAI API key in wp-config.php define('OPENAI_API_KEY', 'your_openai_api_key'); - API URLs: Update the
api_urland ensure the API routes match those used in the JavaScript
code.php$api_url = 'https://api.openai.com/v1/chat/completions'; - Customizing the GPT Prompt: Modify the system prompt to match your specific needs
$conversation_history[] = ['role' => 'system','content' => 'Answer questions only related to [your specific topic], otherwise, say I don\'t know...']; - Registering REST API Endpoints: Ensure the REST API endpoints match the ones used in your JavaScript code.
add_action( 'rest_api_init', function () {
    register_rest_route( 'myapi/v1', '/chat-bot/', array(
        'methods' => 'POST',
        'callback' => 'handle_chat_bot_request',
        'permission_callback' => '__return_true'
    ) );

    register_rest_route('myapi/v1', '/chat-bot-config', array(
        'methods' => 'GET',
        'callback' => 'load_chat_bot_base_configuration',
        'permission_callback' => '__return_true'
    ));
} );
4. Adding the HTML Code
Embedding the HTML Code:
- Edit the WordPress page or post where you want to add the chatbot.
- Add a
Custom HTMLblock. - Paste the provided HTML code into the block.
HTML Code Explanation:
- The HTML code structures the chatbot interface, including the chat window, input area, and message display area.
HTML Code Adjustments
Embedding the HTML Code: Add the chatbot’s HTML structure to your desired WordPress page or post using the Custom HTML block
<script src="https://unpkg.com/@dotlottie/player-component@latest/dist/dotlottie-player.mjs" type="module"></script>

<div class="chatbot-container lwh-open-cbot">
    <div class="custom-chatbot__image" onclick="lwhOpenCbotToggleChat()">
        <dotlottie-player src="https://lottie.host/feefeb87-8206-4b50-8696-bda4747b4fdf/uUJIo0ICb6.json"
            background="transparent" speed="1" style="width: 80px; height: 80px;" loop autoplay></dotlottie-player>
    </div>
    <div class="custom-chatbot">
        <div class="chat">
            <div class="chat__header">
                <div>
                    <div class="chat__title"> AI Project Pad Chatbot </div>
                    <div>
                        <div class="chat__status"><span></span> Online</div>
                    </div>
                </div>
                <div>
                    <div class="chat__close-icon" onclick="lwhOpenCbotToggleChat()">
                        <i class="fa-solid fa-xmark"></i>
                    </div>
                </div>
            </div>
            <div class="chat__messages"></div>
            <div class="chat__input-area">
                <form id="messageForm" onsubmit="lwhOpenCbotonFormSubmit(event)">
                    <div class="input">
                        <input type="text" id="message" name="message" placeholder="Type your message" autocomplete="off" required>
                    </div>
                    <button type="submit" id="submit-btn"><i class="fa-solid fa-paper-plane"></i></button>
                </form>
            </div>
        </div>
    </div>
</div>
Loading Font Awesome: Add Font Awesome to ensure the icons are displayed correctly.
<link rel="stylesheet" href="https://cdnjs.cloudflare.com/ajax/libs/font-awesome/6.0.0-beta3/css/all.min.css" integrity="sha384-k6RqeWeci5ZR/Lv4MR0sA0FfDOM7V8p0n3nj3mjD8hYjK2WQesPvF0SWh0vL+T3B" crossorigin="anonymous">5. Adding the JavaScript Code
Embedding the JavaScript Code:
- Edit the WordPress page or post where you added the HTML code.
- Add a
Custom HTMLblock or paste it within the same block where the HTML is added. - Paste the provided JavaScript code into the block, ensuring it is enclosed within
<script>tags.
JavaScript Code Explanation:
- The JavaScript code manages client-side interactions, including sending user messages, displaying bot responses, and handling API communications.
JavaScript Code Adjustments
API URLs: Update the apiUrl and botConfigurationUrl variables to match the endpoints defined in your PHP code.
const apiUrl = 'https://yourwebsite.com/wp-json/myapi/v1/chat-bot/';
const botConfigurationUrl = 'https://yourwebsite.com/wp-json/myapi/v1/chat-bot-config';
JavaScript Functions: Ensure the JavaScript functions for sending messages, toggling the chat window, adding messages, and fetching data are correctly implemented.
document.addEventListener('DOMContentLoaded', function() {
    const chatWindow = document.querySelector(".lwh-open-cbot .chat");
    chatWindow.classList.add('show');
    lwhOpenCbotfetchBotConfiguration();
});

function lwhOpenCbotToggleChat() {
    const chatWindow = document.querySelector(".lwh-open-cbot .chat");
    chatWindow.classList.toggle('show');
    if(chatWindow.classList.contains('show')){
        document.querySelector(".lwh-open-cbot .custom-chatbot").style.zIndex = '9999';
    } else {
        document.querySelector(".lwh-open-cbot .custom-chatbot").style.zIndex = '9998';
    }
}

async function lwhOpenCbotfetchData() {
    // Your implementation here
}

async function lwhOpenCbotfetchBotConfiguration() {
    // Your implementation here
}
6. Adding the CSS Code
Embedding the CSS Code:
- Edit the WordPress page or post where you added the HTML code.
- Add a
Custom HTMLblock or paste it within the same block where the HTML is added. - Paste the provided CSS code into the block, ensuring it is enclosed within
<style>tags.
CSS Code Explanation:
- The CSS code styles the chatbot interface, ensuring it is visually appealing and user-friendly.
7. Testing the Chatbot
Ensuring All Code Snippets Are Activated:
- Check that all your code snippets (PHP, HTML, JavaScript, CSS, and Font Awesome) are saved and activated in WP Code.
- Visit your WordPress site to verify the chatbot appears and functions as expected.
- Test the chatbot by asking questions and ensuring responses are correctly generated.
8. Troubleshooting
Common Issues and Solutions:
- Chatbot Not Appearing: Ensure all code snippets are activated and there are no JavaScript errors in the browser console.
- API Errors: Verify your OpenAI API key is correctly set and there are no connectivity issues.
- Styling Issues: Ensure the CSS snippet is active and there are no conflicts with other styles on your site.
Tips for Debugging:
- Use browser developer tools to inspect elements and view console logs.
- Check WordPress debug logs for any PHP errors.
9. How To Improve The Value and Accuracy of Information that the chatbot provides
Improving the accuracy of information that GPT provides can be achieved through various methods, ranging from simple adjustments to more advanced techniques. Here’s a ranked list from the most simple to the most advanced, with explanations for each:
Fine-Tuning the Prompt
Simplicity: Simple
Description: The way you phrase your prompt can significantly affect the accuracy of the responses. Providing clear, specific, and detailed prompts helps the model understand the context better.
Implementation:
- Use explicit instructions.
- Provide context within the prompt.
- Include relevant details and constraints.
Example: Instead of asking “Tell me about WordPress,” ask “Explain the key features of WordPress 5.8 and its improvements over the previous version.”
Using System Messages
Simplicity: Simple
Description: Setting a system message to guide the behavior of the GPT model helps in shaping the responses to be more accurate and relevant.
Implementation:
- Use a system message to set the tone, style, and boundaries for the responses.
Example: Set a system message like “You are an expert in WordPress development. Provide detailed and accurate technical explanations.”
Temperature and Max Tokens Adjustment
Simplicity: Simple
Description: Adjusting the temperature and max tokens parameters can influence the quality and length of the responses.
Implementation:
- Lower temperature values (e.g., 0.2) make responses more focused and deterministic.
- Adjust max tokens to ensure completeness without verbosity.
Example: Set temperature to 0.3 for precise responses and adjust max tokens to 100 for concise answers.
Providing Examples (Few-Shot Learning)
Simplicity: Moderate
Description: Providing examples within the prompt helps the model understand the expected output format and content better.
Implementation:
- Include a few examples of questions and accurate answers in the prompt.
Example:
Q: What are the main features of WordPress?
A: WordPress offers a variety of features including a plugin architecture, template system, and an easy-to-use content management system.
Q: How can one install a WordPress plugin?
A: To install a WordPress plugin, go to the WordPress dashboard, navigate to Plugins > Add New, search for the plugin, and click Install Now.
Regular Fine-Tuning
Simplicity: Moderate
Description: Fine-tuning the model on a dataset specific to your needs can improve accuracy.
Implementation:
- Collect a dataset relevant to your domain.
- Fine-tune the model using this dataset to adapt it to the specific language and knowledge of your field.
Example: Fine-tune GPT on a dataset containing technical articles and Q&A about WordPress.
Integrating with Knowledge Bases
Simplicity: Advanced
Description: Enhancing GPT with access to a structured knowledge base ensures that it retrieves accurate and up-to-date information.
Implementation:
- Integrate GPT with databases like Wikipedia, internal knowledge bases, or other structured datasets.
- Use retrieval-augmented generation (RAG) to pull in accurate data points before generating responses.
Example: Before responding, GPT queries a knowledge base to fetch the latest WordPress documentation.
Human-in-the-Loop (HITL) Training
Simplicity: Advanced
Description: Incorporating human feedback into the training process to iteratively improve the model’s accuracy.
Implementation:
- Use human reviewers to evaluate and correct the model’s outputs.
- Retrain the model based on human feedback to improve its performance.
Example: Implement a feedback system where experts review the chatbot’s answers, providing corrections that are used to fine-tune the model further.
Domain-Specific Pre-training
Simplicity: Advanced
Description: Pre-train the model on a large corpus of domain-specific texts before fine-tuning it.
Implementation:
- Collect extensive domain-specific data.
- Pre-train the model on this data to imbue it with domain-specific knowledge.
Example: Pre-train GPT on a massive dataset of WordPress-related blogs, forums, and technical documentation.
Hybrid Models
Simplicity: Most Advanced
Description: Combine GPT with other models or algorithms to enhance accuracy, such as rule-based systems or other specialized AI models.
Implementation:
- Use GPT for natural language understanding and generation.
- Integrate rule-based systems for verification and fact-checking.
Example: GPT generates an initial response, which is then verified by a rule-based system or another AI specialized in fact-checking.
By implementing these methods, from simple prompt adjustments to advanced hybrid models, you can significantly improve the accuracy of the information provided by GPT. Stay tuned for upcoming posts where we will delve into implementing some of these techniques to enhance our chatbot’s performance.
10. References
The code used in this guide was sourced from the following GitHub repository: AI-CHATBOT-Wordpress
For a visual walkthrough, refer to this video: How to Build a Chatbot in WordPress
By following this guide, you will be able to integrate a fully functional GPT-based chatbot into your WordPress website. If you encounter any issues or need further assistance, feel free to reach out.